
I recently redecorated my living room. I’d painted it dark grey (Farrow & Ball Downpipe, fact fans) in 2013, a year after we moved in. I won’t pretend it was anything other than the influence of the designer Abigail Ahern that prompted the colour, it felt new and fresh and exciting and I loved it. I was also heavily influenced by (read: directly copied) the plaster Louis-style fireplace Abigail had in her home, painted in the same Downpipe as the walls. Cute!
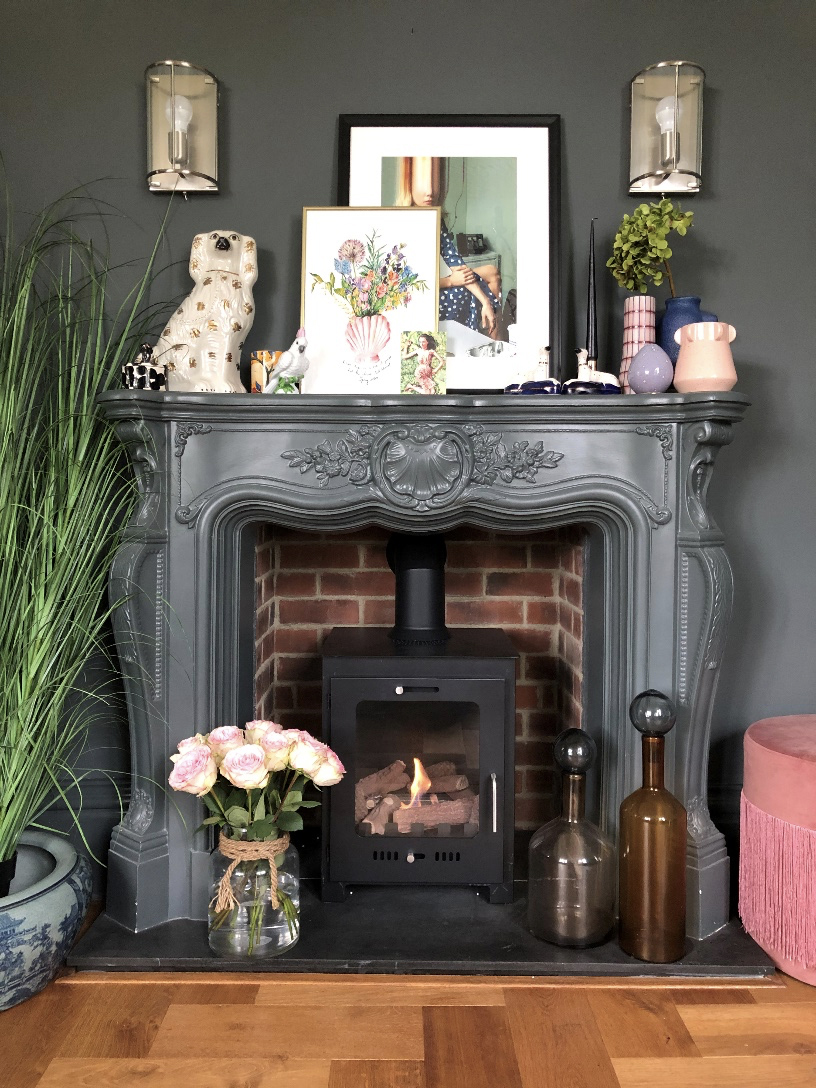
Covid-19 bowled, uninvited, into the world last year, and suddenly we were all prisoners in our own homes, with more time on our hands than ever before. In between working from home, home schooling two reluctant children, and my daily Joe Wicks sesh (alright, I did it once), I started stalking round the house, casting a critical eye. I felt restless, I was gunning for change, and the living room was on my hitlist. It was still perfectly lovely, and there was nothing about it I particularly disliked, but the bleak times left me craving lightness and brightness and change in general. Thus, one of many lockdown projects began. Dark and moody to bright and cheering.
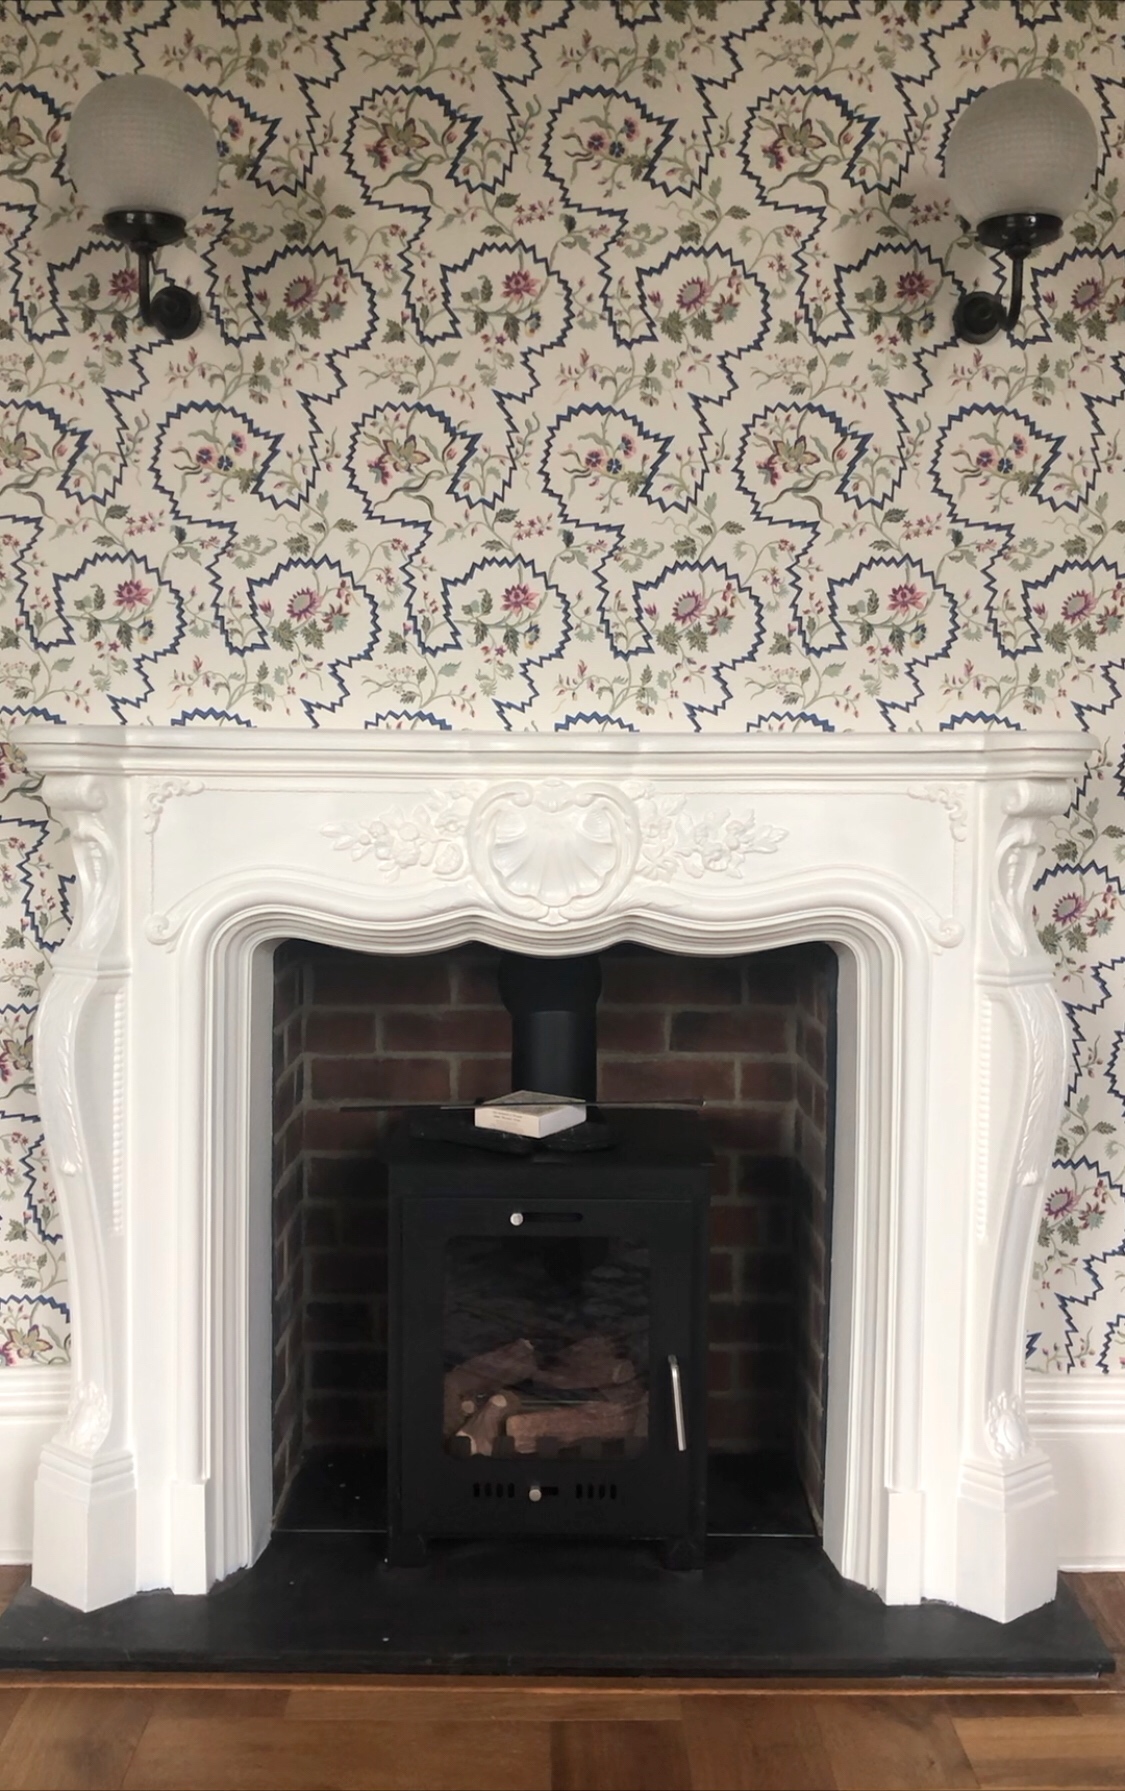
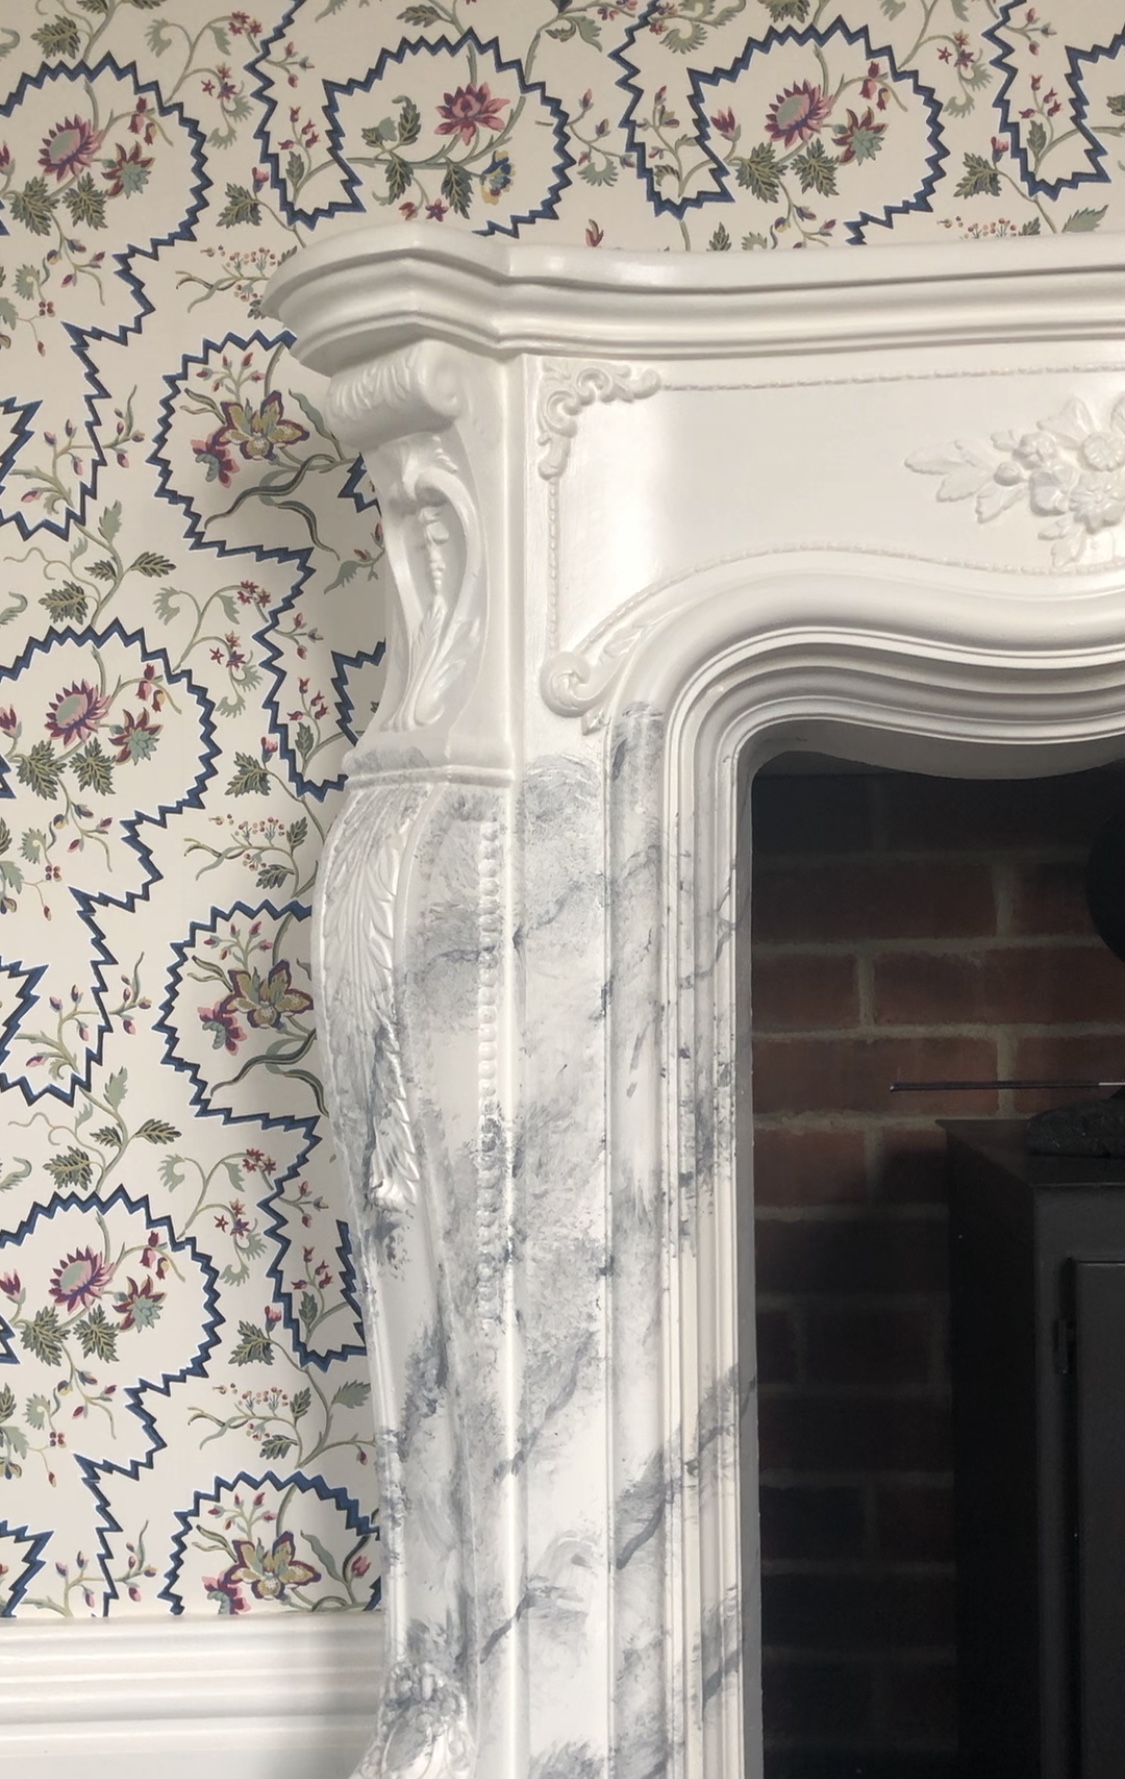
The beating heart of the new scheme was a new wallpaper, La Pannonie by Pierre Frey, which is a beautiful, floral print on a white background. The Louis fireplace which I’d put in in 2013, and which I loved in the plain, Downpipe scheme, felt a bit fussy with the highly patterned wallpaper. A bit too fancy. I’d have loved to have replaced it with a simpler, marble surround, so I got my Google on and within the hour realised it wasn’t happening. Firstly, I’d spent all my money on wallpaper (a regular habit) and marble surrounds don’t come cheap. Secondly, the wooden flooring in the room is laid around the existing fireplace, and the skirting boards shaped around it, and I couldn’t face the potential upheaval of change. So that put the tin hat on that.
The wallpaper went up, I did a happy dance, and I painted the fireplace from dark grey to white. I didn’t like it. It felt too stark, too bright, too “HERE I AM, I AM THE FIREPLACE”, and given that I wasn’t feeling the love for the style of the fireplace any more, this simply wouldn’t do. I’d wanted marble, so I had a lightbulb moment. If I couldn’t change the shape, or change it to marble, I could at least make it look like marble! A paint effect! How very 1980s of me!
Now when it comes to marble, I like a deep, strong vein. I don’t know how to make that sound less filthy, so I won’t try. I love a massive hunk of Arabescato or Calacatta, so that was my starting point. And, should you fancy having a go at this yourself, I’m going to tell you how I did it. What’s more, I also made a video (below), as it’s always more useful to see these things in action. Let’s make like Linda Barker and get our rag roll on!
What you need
- Grey paint – whatever shade matches the look you’re going for. I used some leftovers – Farrow & Ball “Railings” eggshell mixed with “Wimborne White” eggshell to lighten it.
- White paint – the aforementioned Wimborne, in my case. Any shade of white will do, as long as you’re happy with it. I’d already painted my fireplace this colour anyway, so that was that.
- Two artist’s sponges, damp and pliable but not soaking wet.
- Large, long-bristled decorating paintbrush (I started out using one but it actually wasn’t really necessary, so feel free to sack this one off).
- A variety of fine artist’s paintbrushes (go cheap, we’re not recreating the ceiling of the Sistine Chapel).
- A feather or, as I wasn’t massively up for stalking the streets of Yorkshire looking for a pigeon’s manky cast-offs, a small piece of torn cardboard will do.
- A picture of the sort of marble you’re aiming to recreate, to work from.
What to do
- The first stage is all about creating a smudgy, blended foundation, and we need a base of wet paint to start with. My fireplace had already been painted white, and the paint was dry, so I gave it very quick coat of the same colour white using a damp sponge with a small amount of white paint on it. Work in sections, to stop the paint from drying out before you get a chance to work with it.
- Then take one of the fine paintbrushes and start to paint on your veining, using the grey paint. Keep your wrist loose (having a large wine beforehand might help) and drag the paintbrush across the surface. The veining all needs to broadly go in one direction, it needs to be on an angle, but it doesn’t have to be perfect at all. I should add at this point, that our white paint is our bezzie mate in this process – we can use it to cover up any mistakes, or tone down anything we’re not happy with as we go along. So, relax (another 80s reference for you there).
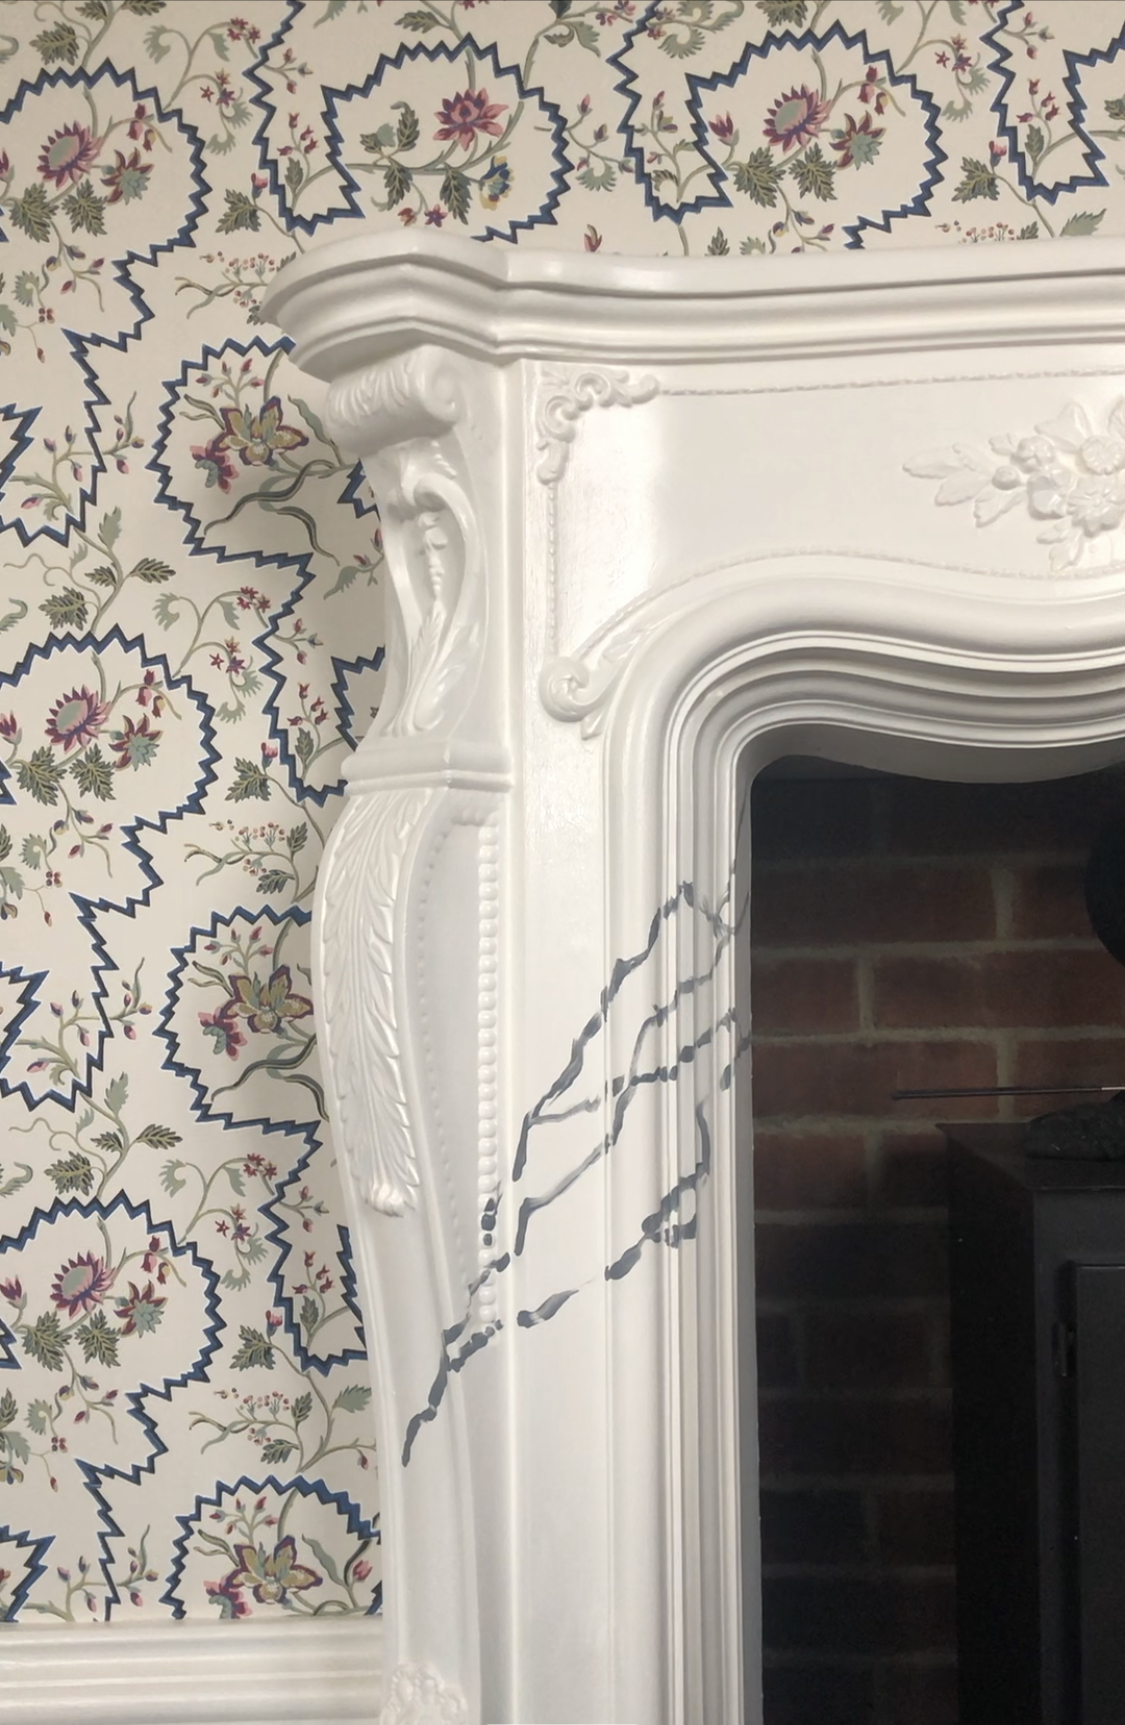
- Once you’ve painted your grey veining on a small area, take one of your damp sponges and dab it repeatedly over the paint lines, creating a smudged, smoky effect. Then use your other sponge with the white paint to dab over the top of the grey smudged areas, to create areas of light and dark. We’re building a base layer here, and breaking up the stark whiteness of the existing fireplace. Once you’ve smudged up one area, you might want to loosely brush over the whole surface with your long-bristled decorating paintbrush to smooth down the paint surface. I started doing this but I don’t think it’s essential so I packed it in after a bit. Then, start again with steps 1, 2 and 3. Keep referring to the picture of your chosen marble as you go along to stay on the right lines.
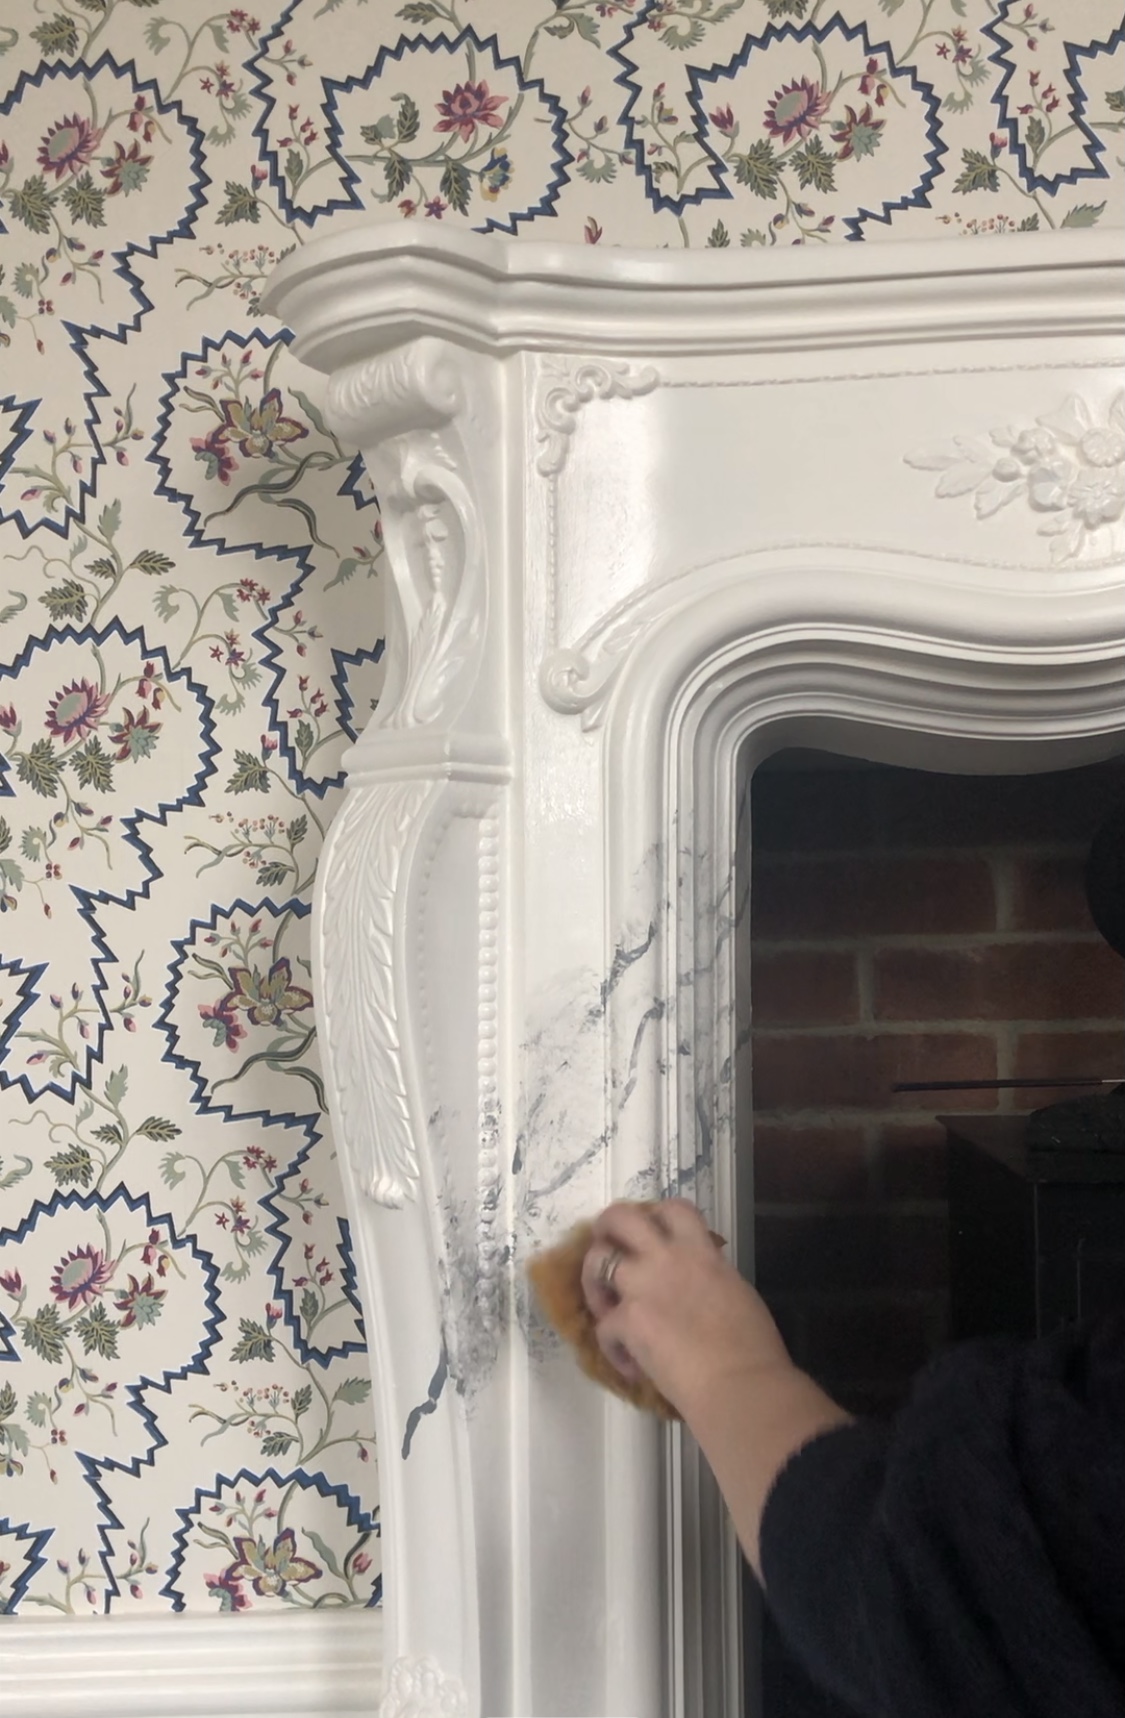
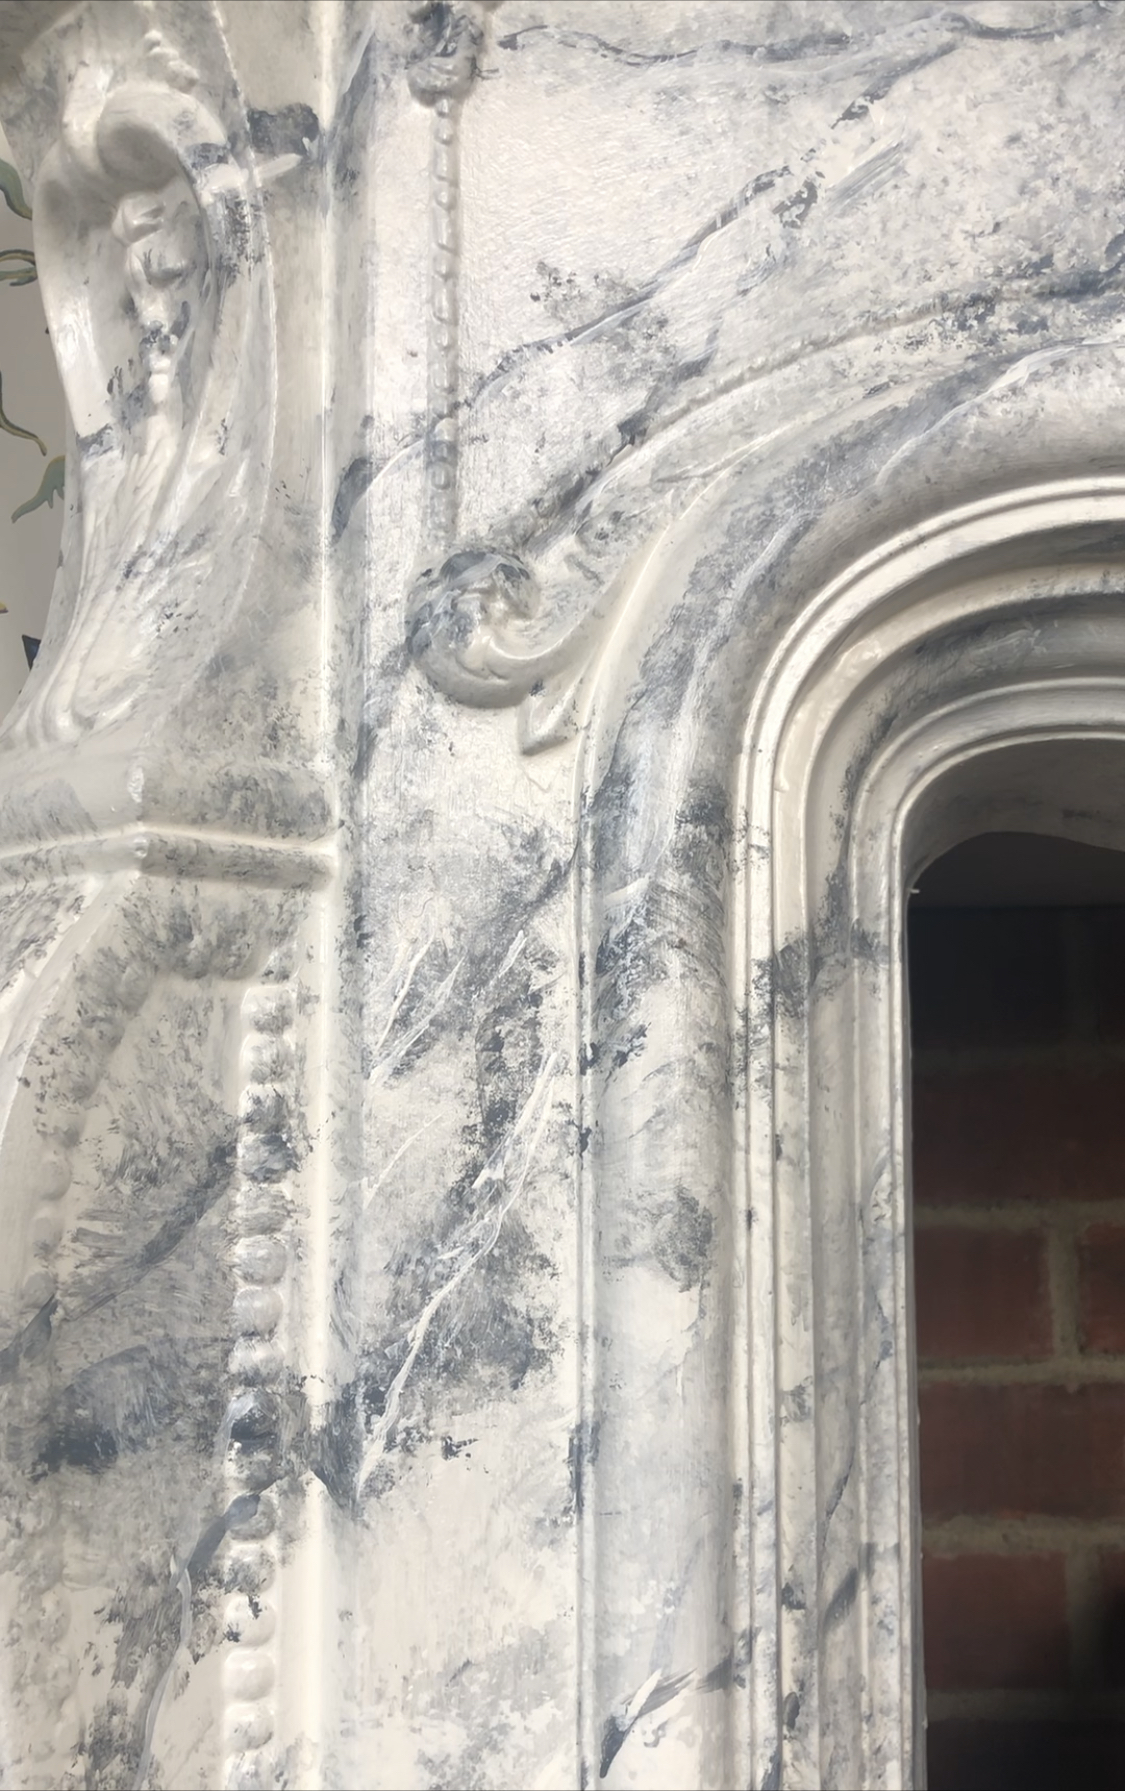
- Eventually, you’ll have covered the whole surface and you’ll have a nice smudgy base layer. Then we need to go back to the beginning, and paint more definitive veins over the top of our smudgy ones, using the same grey paint. Again, keep it free and easy, hold the brush like you’re conducting on orchestra, and drag it loosely across the paint surface. Then pull off a small piece of sponge to dab over the newly painted veins. This time we need to keep the veins a bit tighter and be gentler with the smudging, as we need the veins to stay looking like defined veins. Again, you can use a small piece of sponge to dab some white about, if you fancy it.
- Once you’re happy with the overall veining, it’s time to bring in the feather/piece of cardboard to add in a few very fine, white veins, which give a more authentic, natural stone appearance. As you can see from the video, I started off using the cardboard, but moved on to a very fine brush. Have a play about and see what works best for you. There ain’t no rules.

- And that’s it! Sit back, have another wine and admire your marble-ous handiwork!
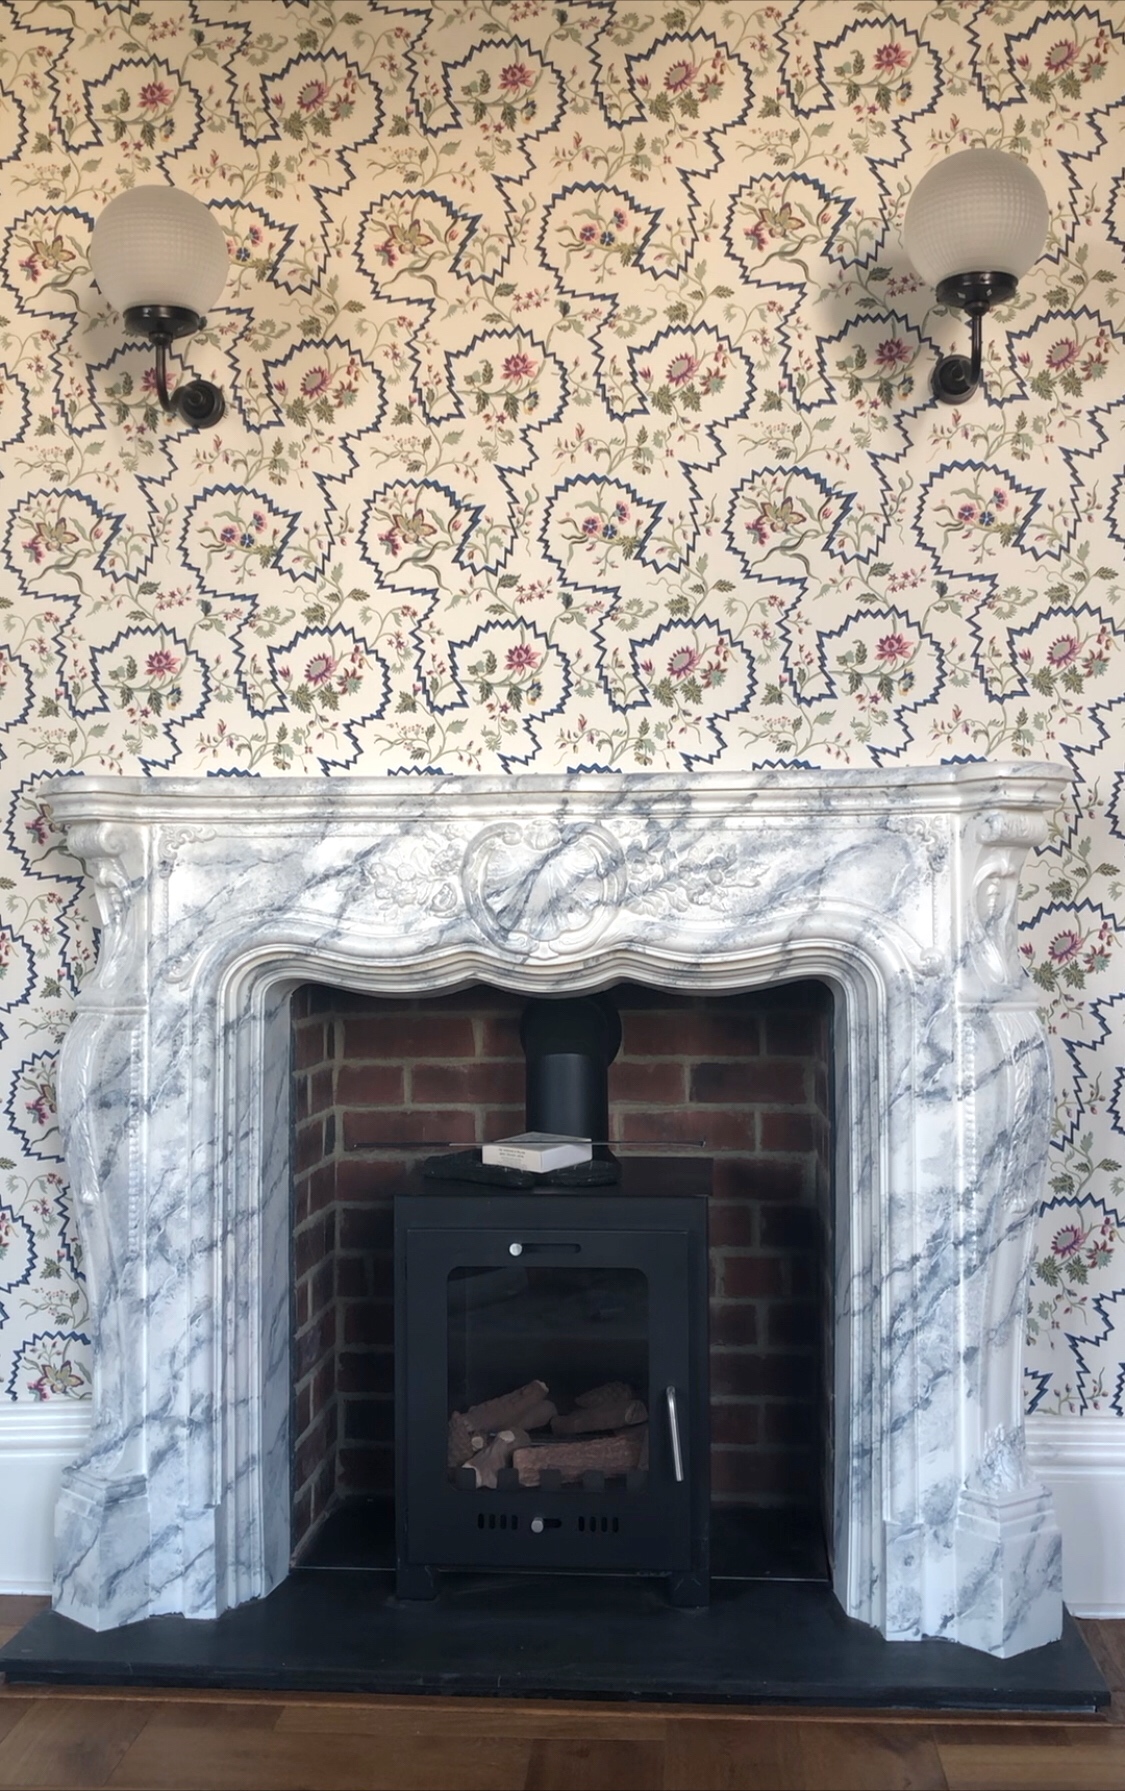
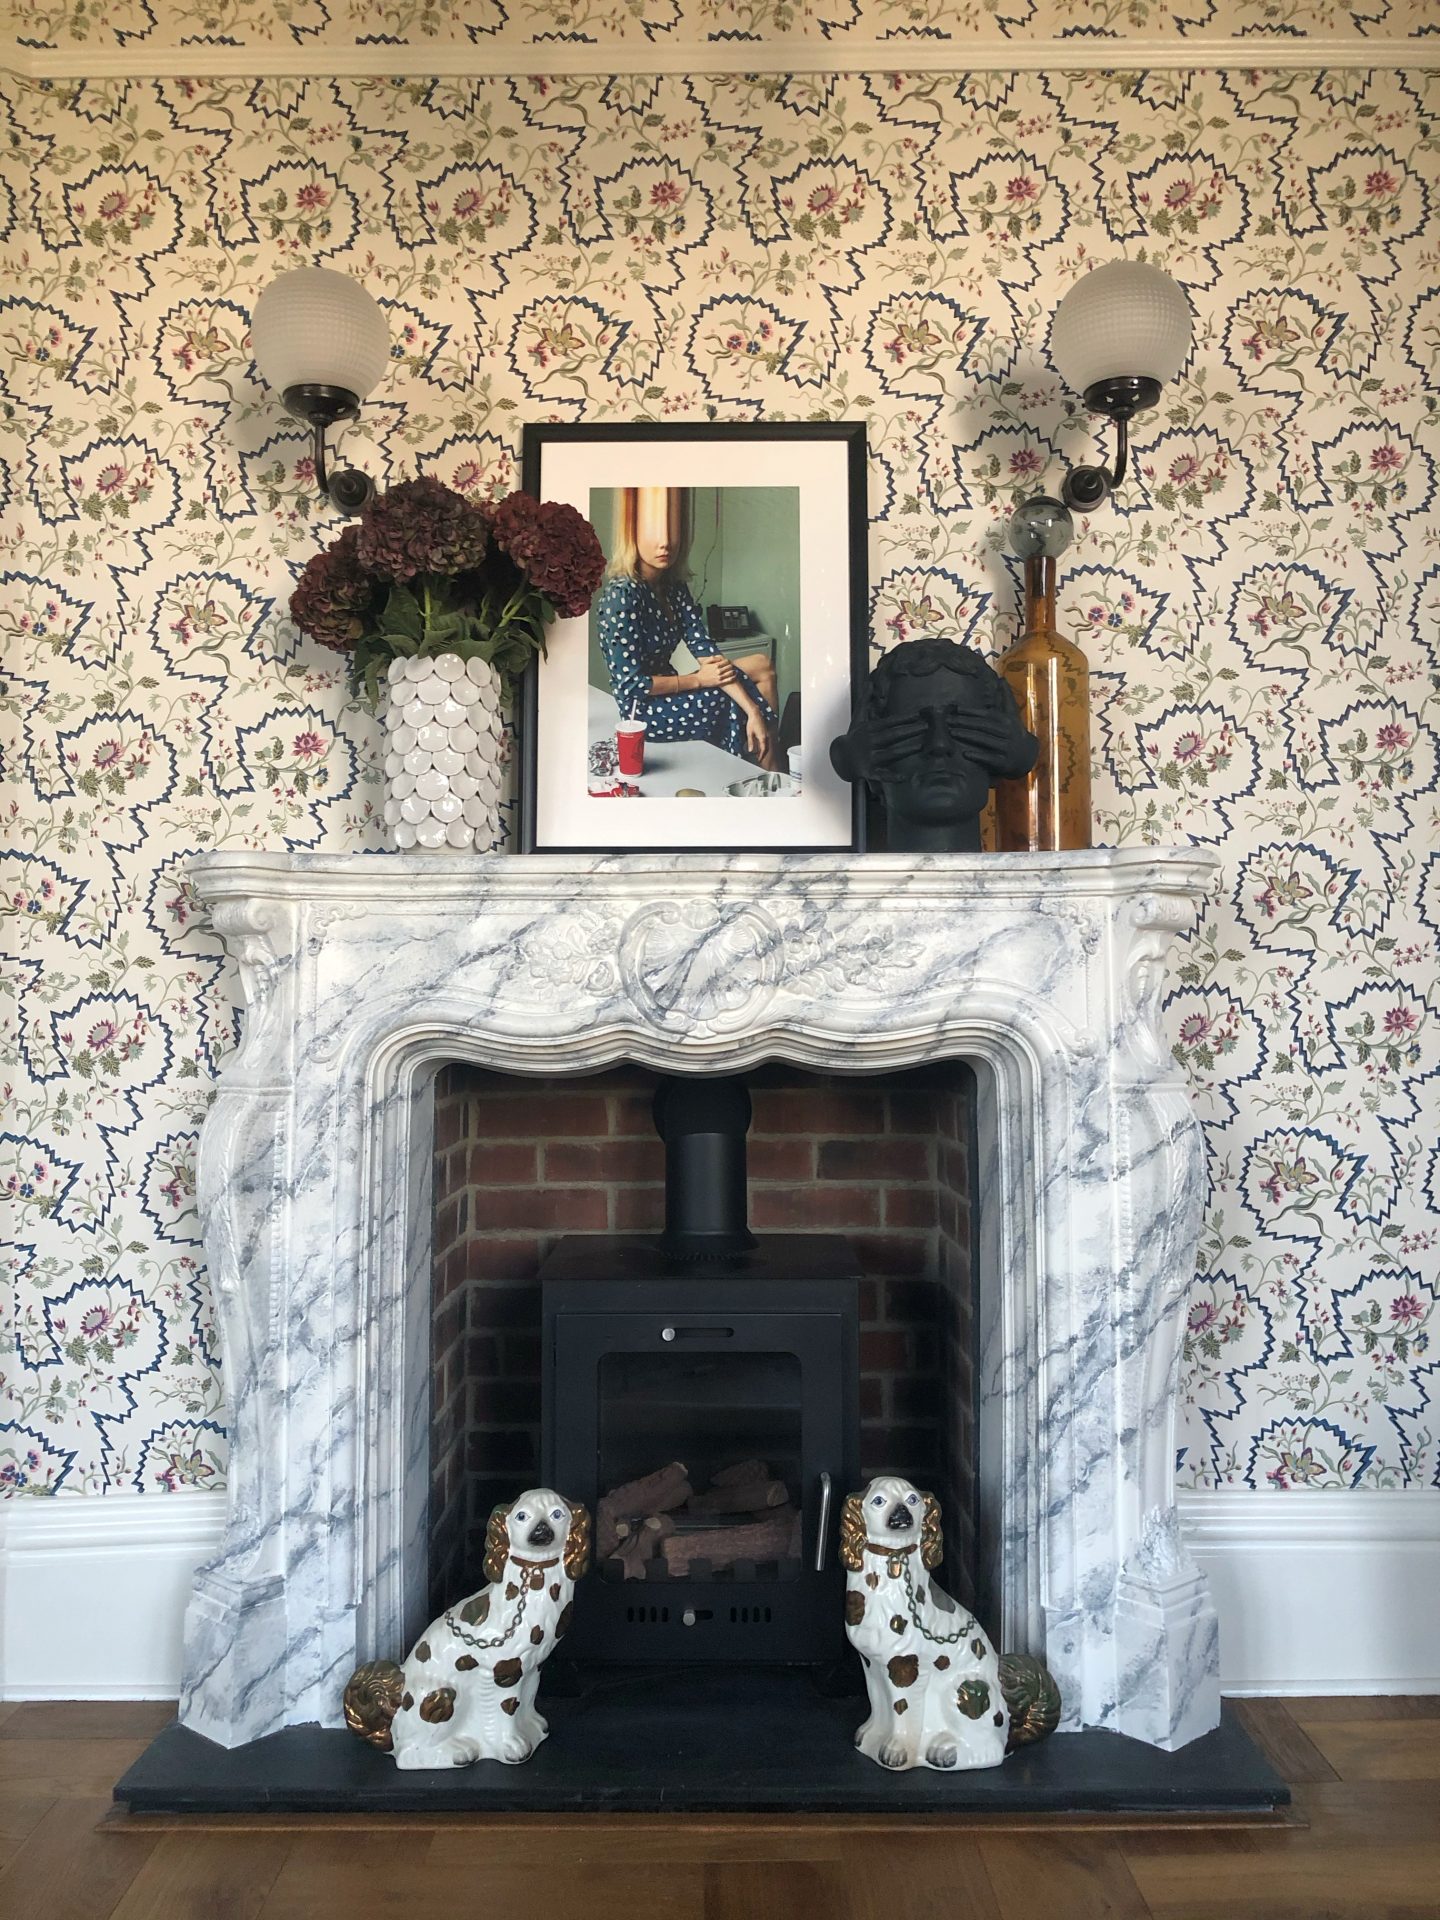
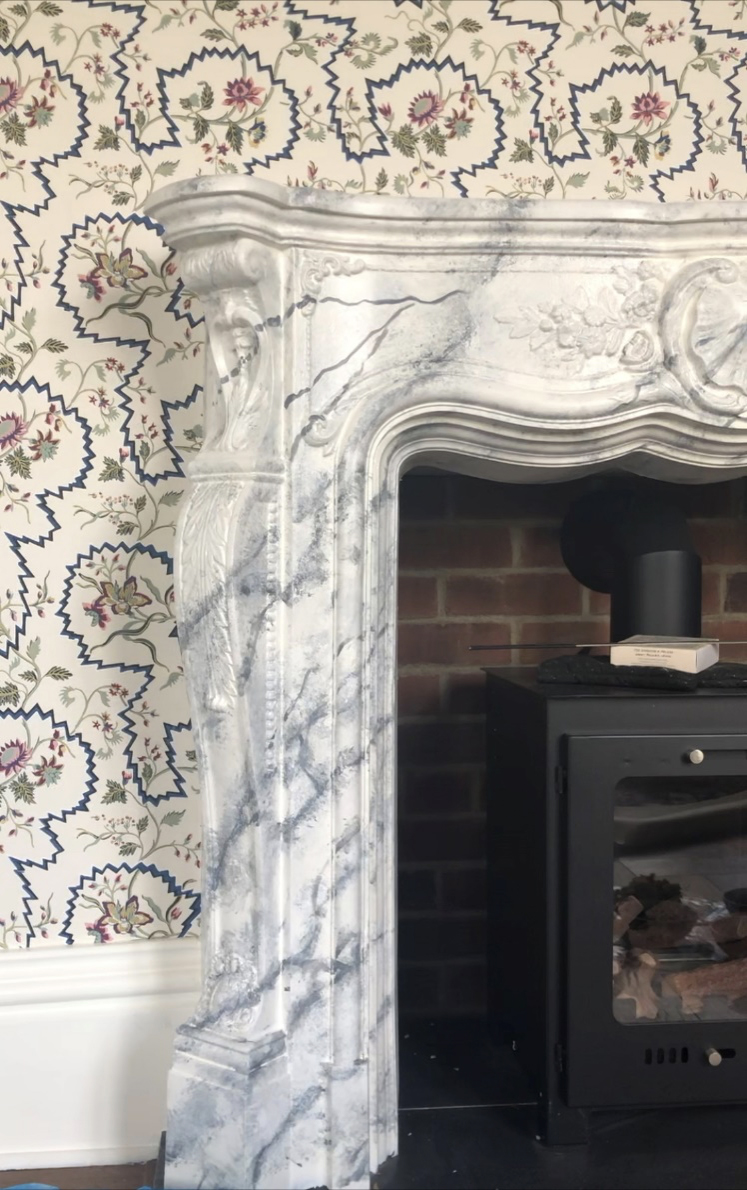
I’m really pleased with the outcome. It might not be the marble fireplace of my dreams, and I couldn’t magically make the overall shape of the fireplace simpler, but I love the dramatic, veined effect and it’s toughened up the look of the fireplace against the very pretty, floral wallpaper (I like to toughen up a floral). Obviously, the wallpaper and the fireplace are quite a full-on look together, that’s just my personal preference, but you can easily make the veining paler and finer, and there is no requirement to pair it with wildly patterned wallpaper.
You could use this technique on a tabletop too, although you’d need to seal the surface so it could stand up to general table duties.
If you give this a go, you must let me know and send me a picture!
Ohh Sandra I really enjoyed this especially the video. Your fireplace looks great . It’s got me thinking what I can try doing the marble effect on now x
Author
Thanks Jayne! Marble everything you can think of! x
This is so clever. I love the video! Very profess
Author
I missed this! Thanks for watching Nikki! 🙂